Baterias CNHL Lipo
A CNHL tem como objetivo fornecer baterias Li-Po de alta qualidade e produtos RC a todos os entusiastas de hobbies, com um excelente serviço ao cliente e preços competitivos

Se tens estado a observar o Super Tucano 1600mm há algum tempo, provavelmente viste o mesmo tema no feedback dos proprietários: as pessoas não só gostam — continuam a voltar a ele. Um revisor chamou-o diretamente de “o melhor avião pelo dinheiro” e disse que a CNHL “resolveu os problemas do avião da geração 1.” Outro piloto comparou a sensação de voo a aviões de pattern antigos dos anos 80 e 90, o que é um elogio muito específico: voo suave, rastreamento firme e gestão previsível da energia.
Este não é um post de “ficha técnica”. É uma revisão de configuração do mundo real — o tipo que queres aberto no telemóvel enquanto montas, equilibras e ajustas os comandos antes do voo inaugural. Vamos abordar o que realmente importa: decisões de montagem que evitam dores de cabeça, CG e colocação da bateria que impedem o nariz de ficar pesado, se os retráteis valem a pena na relva, e como abordar as definições dos flaps de forma eficaz e mecânica gentil para o avião.

Antes de darmos a nossa opinião, aqui está a linha base rápida. Estes são os detalhes que aparecem em decisões reais no campo: Escolha da bateria, equilíbrio, comportamento dos flaps, fiabilidade dos retráteis e quanto rádio é necessário para que o avião “pareça certo”.
| Artigo | O que significa na prática |
|---|---|
| Classe de tamanho | Envergadura de 1600mm (63") e comprimento ~1617mm — presença estável e de “avião grande”, sem comportamento nervoso de park-flyer. |
| Sistema de potência | Motor 5052-525KV + ESC 100A com capacidade de inversão — potência forte, mais fluxo de trabalho opcional de empuxo reverso para descolagens curtas. |
| Principais características | Retráteis elétricos com amortecedores oleo, flaps funcionais, iluminação LED de navegação/aterragem/formação muito brilhante durante o dia, hélice de escala de cinco pás. |
| Janela da bateria | Intervalo recomendado 6S (comumente voado entre 4000–6000mAh) — CG e sensação de aterragem dependem muito da colocação, não só da capacidade. |
| Necessidades do rádio | 6–7 canais é a zona confortável se quiseres retráteis + flaps sem compromissos estranhos. |
Verificação do pulso do proprietário: “Numa escala de 1 a 10 é um 11… suave… o trem de aterragem é excelente… opero em relva.”
Esse único comentário toca três temas que vais ver repetidamente: sensação de voo, durabilidade do trem de aterragem e praticidade em campo.
Muitos proprietários descrevem a construção como direta: poucas peças, tudo encaixa limpo e a fuselagem monta-se sem dramas. Mas uma análise também destacou um risco muito real: usar a cola errada numa união estrutural importante de espuma para espuma pode transformar uma construção simples em pânico. A orientação “adulta” mais simples é esta:
Se és do tipo de construtor que quer uma lista curta, aqui está: encaixa tudo a seco, confirma o alinhamento, lixa e limpa ligeiramente as superfícies para colar, usa epóxi para as uniões grandes e deixa curar completamente. É um conselho aborrecido — e evita o único tipo de aborrecimento que realmente odeias: refazer.

Esta é a secção mais prática de toda a análise. Alguns proprietários notaram que mesmo com uma bateria de 5000mAh colocada bem atrás, o avião ainda pode tender a ficar ligeiramente com o nariz pesado — e alguns pilotos preferem mesmo assim porque aterra “com autoridade” e parece estável. Outros preferem uma sensação mais neutra e usaram pequeno peso na cauda (um mencionou cerca de uma onça) para deslocar o equilíbrio.
Aqui está a mentalidade que recomendo para esta configuração do Super Tucano 1600mm:
Um proprietário aparou um pouco de espuma para deslizar um pack de ~5200mAh para trás para o CG. Isso não é um requisito — é um exemplo de um ajuste prático “faça caber do jeito que você voa”. Se estiver a fazer algo assim, vá devagar e mantenha a estrutura limpa: quer uma instalação de bateria limpa e repetível, não um truque de uma só vez.
Nota sobre a bateria: se quiser um alcance de pack que corresponda à janela de configuração pretendida, comece aqui: Baterias 6S LiPo para Super Tucano 1600mm. Concentre-se primeiro no equilíbrio e ajuste — a capacidade vem em segundo lugar.

Vários proprietários disseram que os primeiros voos pareceram mais sensíveis do que o esperado — não porque o avião seja instável, mas porque a configuração padrão do curso pode parecer viva se estiver habituado a modelos de espuma menores. Um piloto mencionou precisar de muito mais curso de profundor/alerões/rabeta do que o manual sugeria, depois usando taxas duplas e expo para fazer o avião sentir-se natural. Essa é uma aproximação muito normal para aviões de padrão: dê a si mesmo total autoridade, depois molde a resposta às suas mãos.
Uma forma simples e segura de configurar o Super Tucano:
Verificação rápida do proprietário: “Voa como um avião de padrão antigo dos anos 80 e 90… suave.”
É geralmente isso que sente depois do avião estar aparado e as taxas/expo ajustadas aos seus hábitos.
Esta é uma das maiores razões pelas quais as pessoas adoram esta célula. Os retráteis não são apenas uma demonstração de escala aqui — fazem parte da usabilidade, especialmente em campos de relva. Vários proprietários elogiaram especificamente o trem de aterragem e reportaram manuseio suave no solo em relva, mesmo quando o campo está um pouco irregular. É exatamente aqui que os amortecedores oleo e uma configuração triciclo bem desenhada compensam: reduzem a sensação de “cada aterragem é um teste”.
Conclusão prática:

Os flaps são a característica que faz este Super Tucano parecer “maduro” no padrão de aterragem. Eles também merecem respeito porque as superfícies dos flaps são substanciais — e algumas análises reportaram problemas nos servos dos flaps ao passar de flaps a meio para flaps completos na aproximação. Quer tenha sido um lote fraco de servos, endpoints agressivos, ou simplesmente velocidade aérea excessiva, a lição é a mesma: não trate os flaps completos como um botão liga/desliga em alta velocidade.
Aqui está um fluxo de trabalho conservador para configuração dos flaps com que os pilotos realmente podem viver:
Três dicas de configuração que importam mais do que a percentagem exata:
Verificação do pulso do proprietário: “Os flaps de aterragem inclinam o avião para cima… ainda a trabalhar nos flaps… aterra extremamente bem com 0 flaps.”
Isso é realmente tranquilizador: significa que pode voar e aterrar confortavelmente enquanto ajusta gradualmente o comportamento dos flaps.
O ESC suporta empuxo reverso e pode realmente encurtar o rolamento quando usado corretamente. Mas aqui está o conselho honesto: o inverso não é uma funcionalidade para o voo inaugural. Ajuste corretamente o CG, confirme que o avião mantém a trajetória reta e faça aterragens aborrecidas primeiro. Depois adicione o inverso mais tarde se o seu campo beneficiar disso. Um proprietário mencionou até um “fio misterioso” que poderá ser para o inverso e optou por não o usar — o que é uma decisão perfeitamente razoável se tiver comprimento de pista suficiente.
Se configurar o inverso, teste-o com disciplina: use um interruptor dedicado, mantenha-o desativado nas fases de voo em que não quer surpresas, e experimente-o apenas após o toque no solo com o avião a rolar em linha reta.
É aqui que o Super Tucano justifica o seu prestígio. Os proprietários descrevem-no como estável, suave e “atraente para o público.” Parece um turboélice (a hélice de cinco pás ajuda), mantém uma trajetória limpa e não tem medo de passagens em alta velocidade. Ao mesmo tempo, é suficientemente tolerante para que pilotos que não se consideram “profissionais” ainda relatem boas descolagens, manuseamento em solo e aterragens.
Algumas notas práticas de voo extraídas da experiência dos proprietários:

Esta secção é como manter um warbird 1600mm divertido a longo prazo. Dois problemas surgiram no feedback detalhado: stress no servo dos flaps e confiança nas ligações/clevis. Ambos são fáceis de resolver proativamente.
Se quer um warbird em escala que pareça suave e robusto, e gosta de ter flaps e retráteis como parte da experiência, esta é uma resposta fácil “sim.” Também é uma ótima escolha se o seu campo for de relva e estiver cansado de trens de aterragem que parecem um compromisso.
Se é mesmo novo em aviões RC, retráteis + flaps + possível configuração de empuxo reverso pode ser “demasiado sistema” no primeiro dia. Um principiante pode pilotá-lo, mas aprender num treinador mais simples com trem de aterragem fixo é ainda o caminho mais sensato.
Se quiser verificar a disponibilidade atual, o que está incluído no conjunto e os detalhes exatos da configuração, pode encontrar aqui: Super Tucano 1600mm Avião RC.
A CNHL tem como objetivo fornecer baterias Li-Po de alta qualidade e produtos RC a todos os entusiastas de hobbies, com um excelente serviço ao cliente e preços competitivos
Verificação Rápida de Ajuste O Combo 2 Packs CNHL Black Series V2.0 1300mAh 22.2V 6S 130C LiPo com Ligação XT60 é uma escolha forte para pilotos FP...
Ver detalhes completos

Hstar D43-01Q 911 Style é um mini carro RC de drift em liga 1/43, concebido para diversão em mesas interiores e drifting realista. Apresenta acel...
Ver detalhes completos

Disponibilidade de Peças Sobressalentes Sabemos que para pilotos de RC, o suporte fiável de peças sobressalentes muitas vezes determina ...
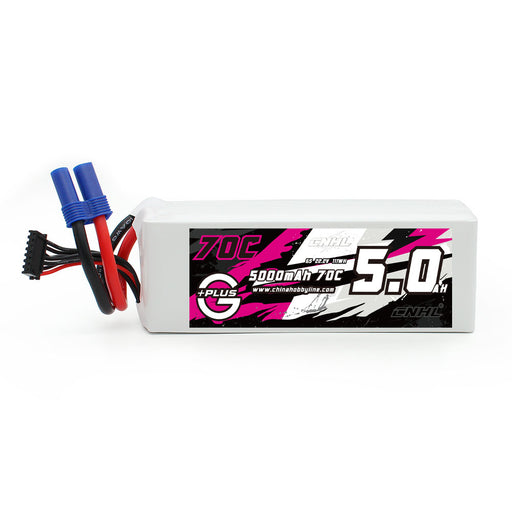
Ver detalhes completosEspecificações: Número de Stock: 500706EC5 Capacidade: 5000mAh Tensão: 22.2V / 6-Células / 6S1P Taxa de Descarga: 70C Contínua / 140C Pico Taxa d...
Ver detalhes completos
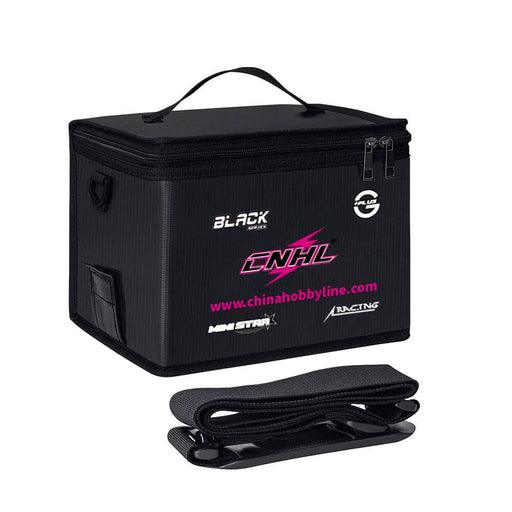
A Bolsa de Bateria LiPo CNHL foi desenhada para um carregamento, transporte e armazenamento mais seguros de LiPo em casa ou no campo. Acrescenta um...
Ver detalhes completos

A CNHL é a primeira a trazer para o mercado o avião de estreia da AviNationRC, o Horten Ho-229 — um EDF compacto que combina um raro design de asa...
Ver detalhes completos

O Planador CNHL KAVAN Pulse 2200 V2 PNP em laranja não é um planador motorizado básico para voos casuais iniciais. É um planador desportivo elétri...
Ver detalhes completos

Avião RC CNHL Bison XT STOL 1750mm PNP (Laranja) O CNHL Bison XT STOL V2 é uma aeronave grande de asa alta estilo bush construída para voo lento ...
Ver detalhes completos

Verificação Rápida de Ajuste A bateria CNHL Lightning LiHV 7800mAh 4S 120C é concebida para plataformas RC de alto desempenho que requerem forte po...
Ver detalhes completos

Verificação Rápida de Ajuste A bateria CNHL Lightning LiHV 6700mAh 6S é projetada para pilotos RC que precisam de potência de explosão forte com en...
Ver detalhes completos


Deixe um comentário